


Use our Custom API with Zapier to quickly and easily add real-time email verification to countless third-party apps.
Key Features
Zapier allows users to create "Triggers" and "Actions" to help automate operations based on a users’ needs. A “Zap” combines a trigger from one product with an action in another — whenever the trigger event occurs, Zapier automatically completes the action for you.
Actions Supported by NeverBounce
- Verify Email Address - Checks validity of email address submitted in third-party app
Connecting NeverBounce with Zapier
As an example, let's say you want to verify email addresses submitted in a Google Form using NeverBounce.
To begin, login to your Zapier account and click Make a Zap!![]()
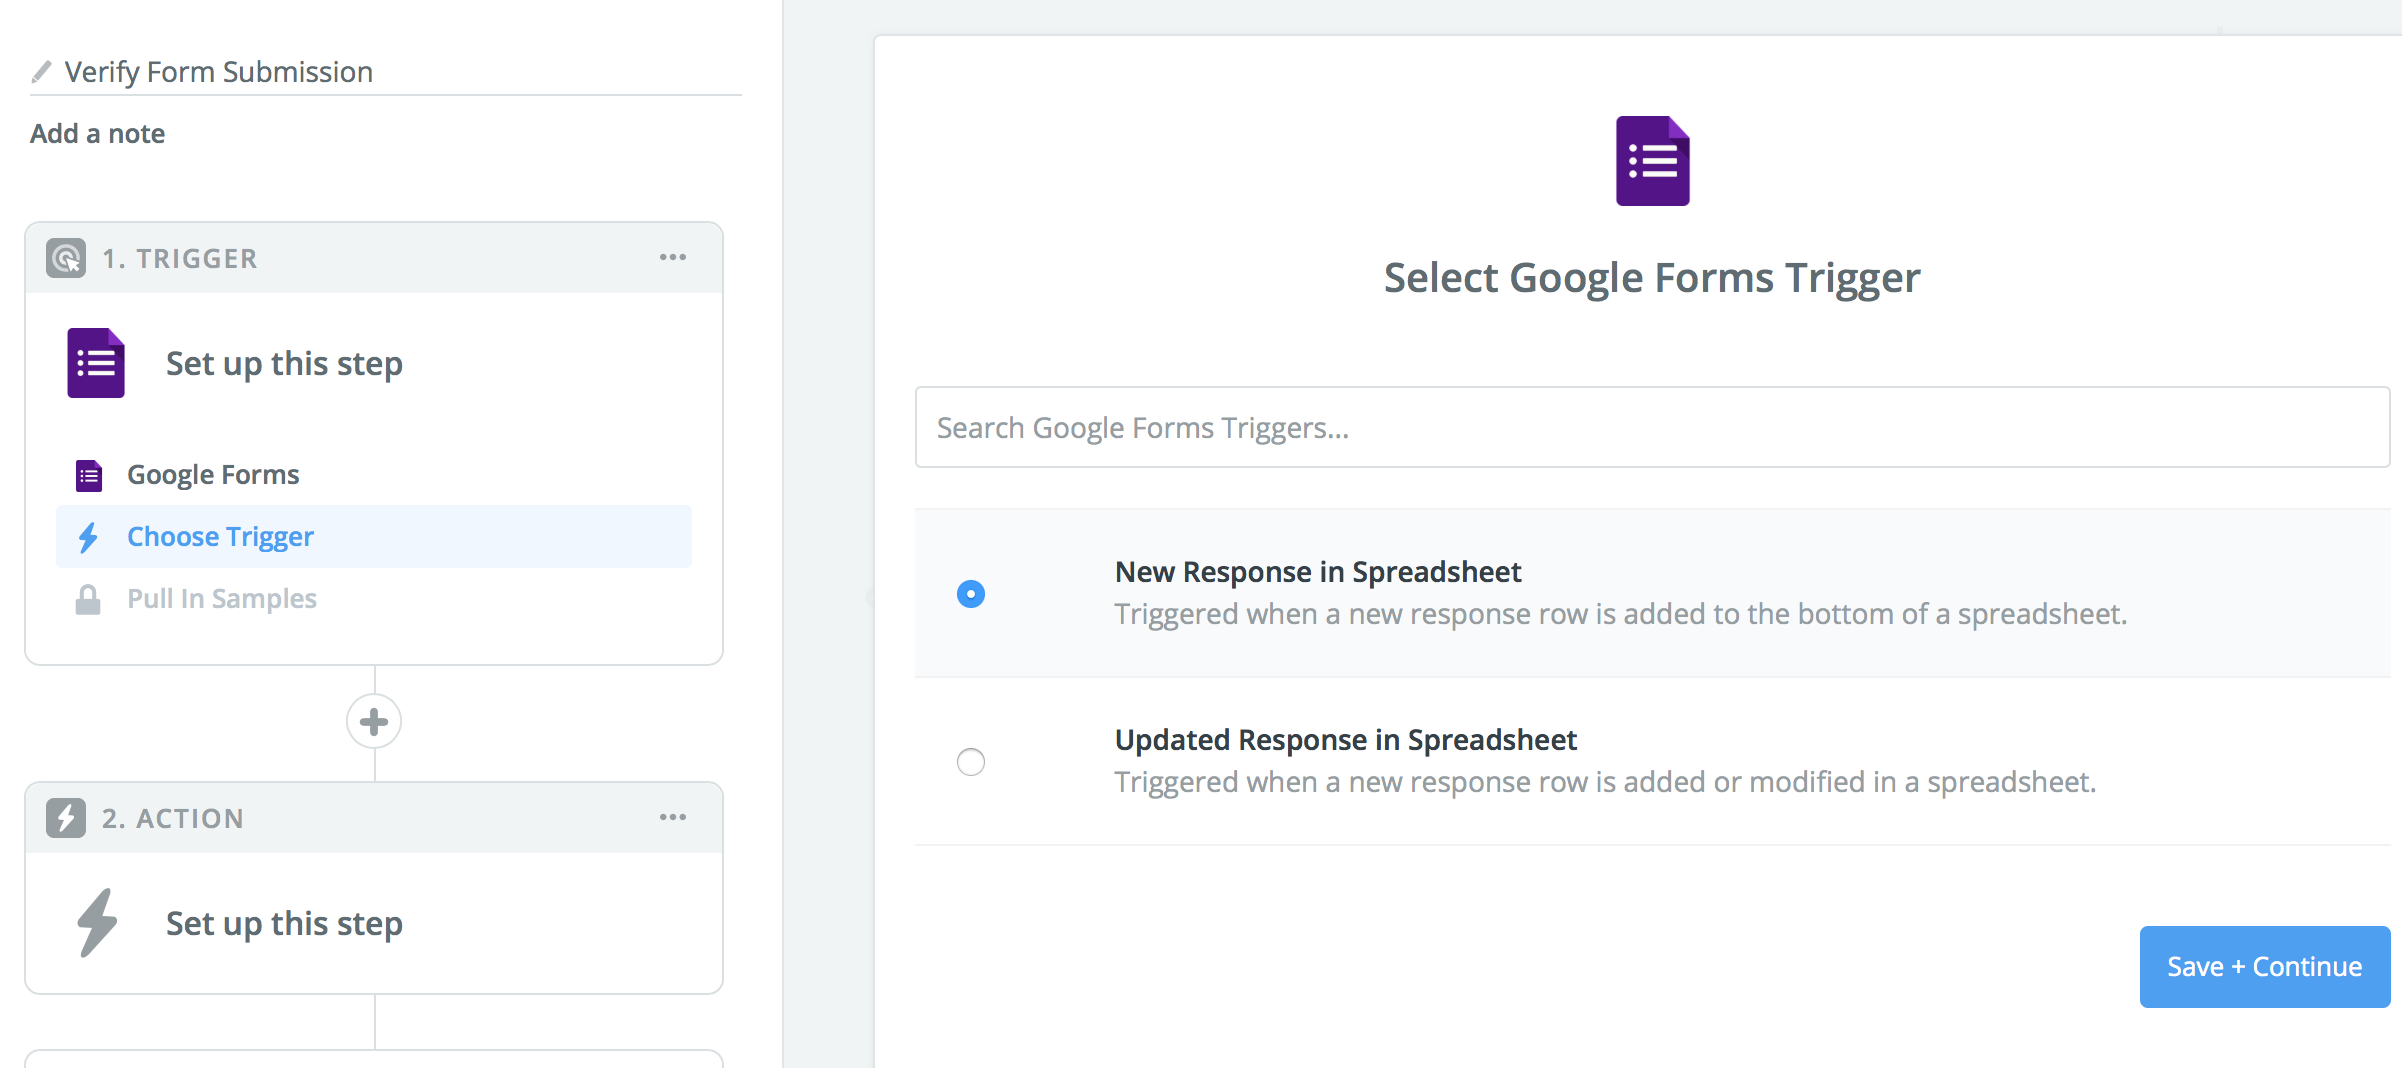
Zap Trigger
Select Google Forms from the list of applications and choose New Response in Spreadsheet as the trigger for your Zap. Once you Save + Continue you will then be prompted to connect the Google Forms account you wish to use.
Search for the Spreadsheet and Worksheet linked to the relevant Google Form, then click Continue. You will be prompted to double-check the worksheet details – if everything looks correct you can then click Fetch & Continue.
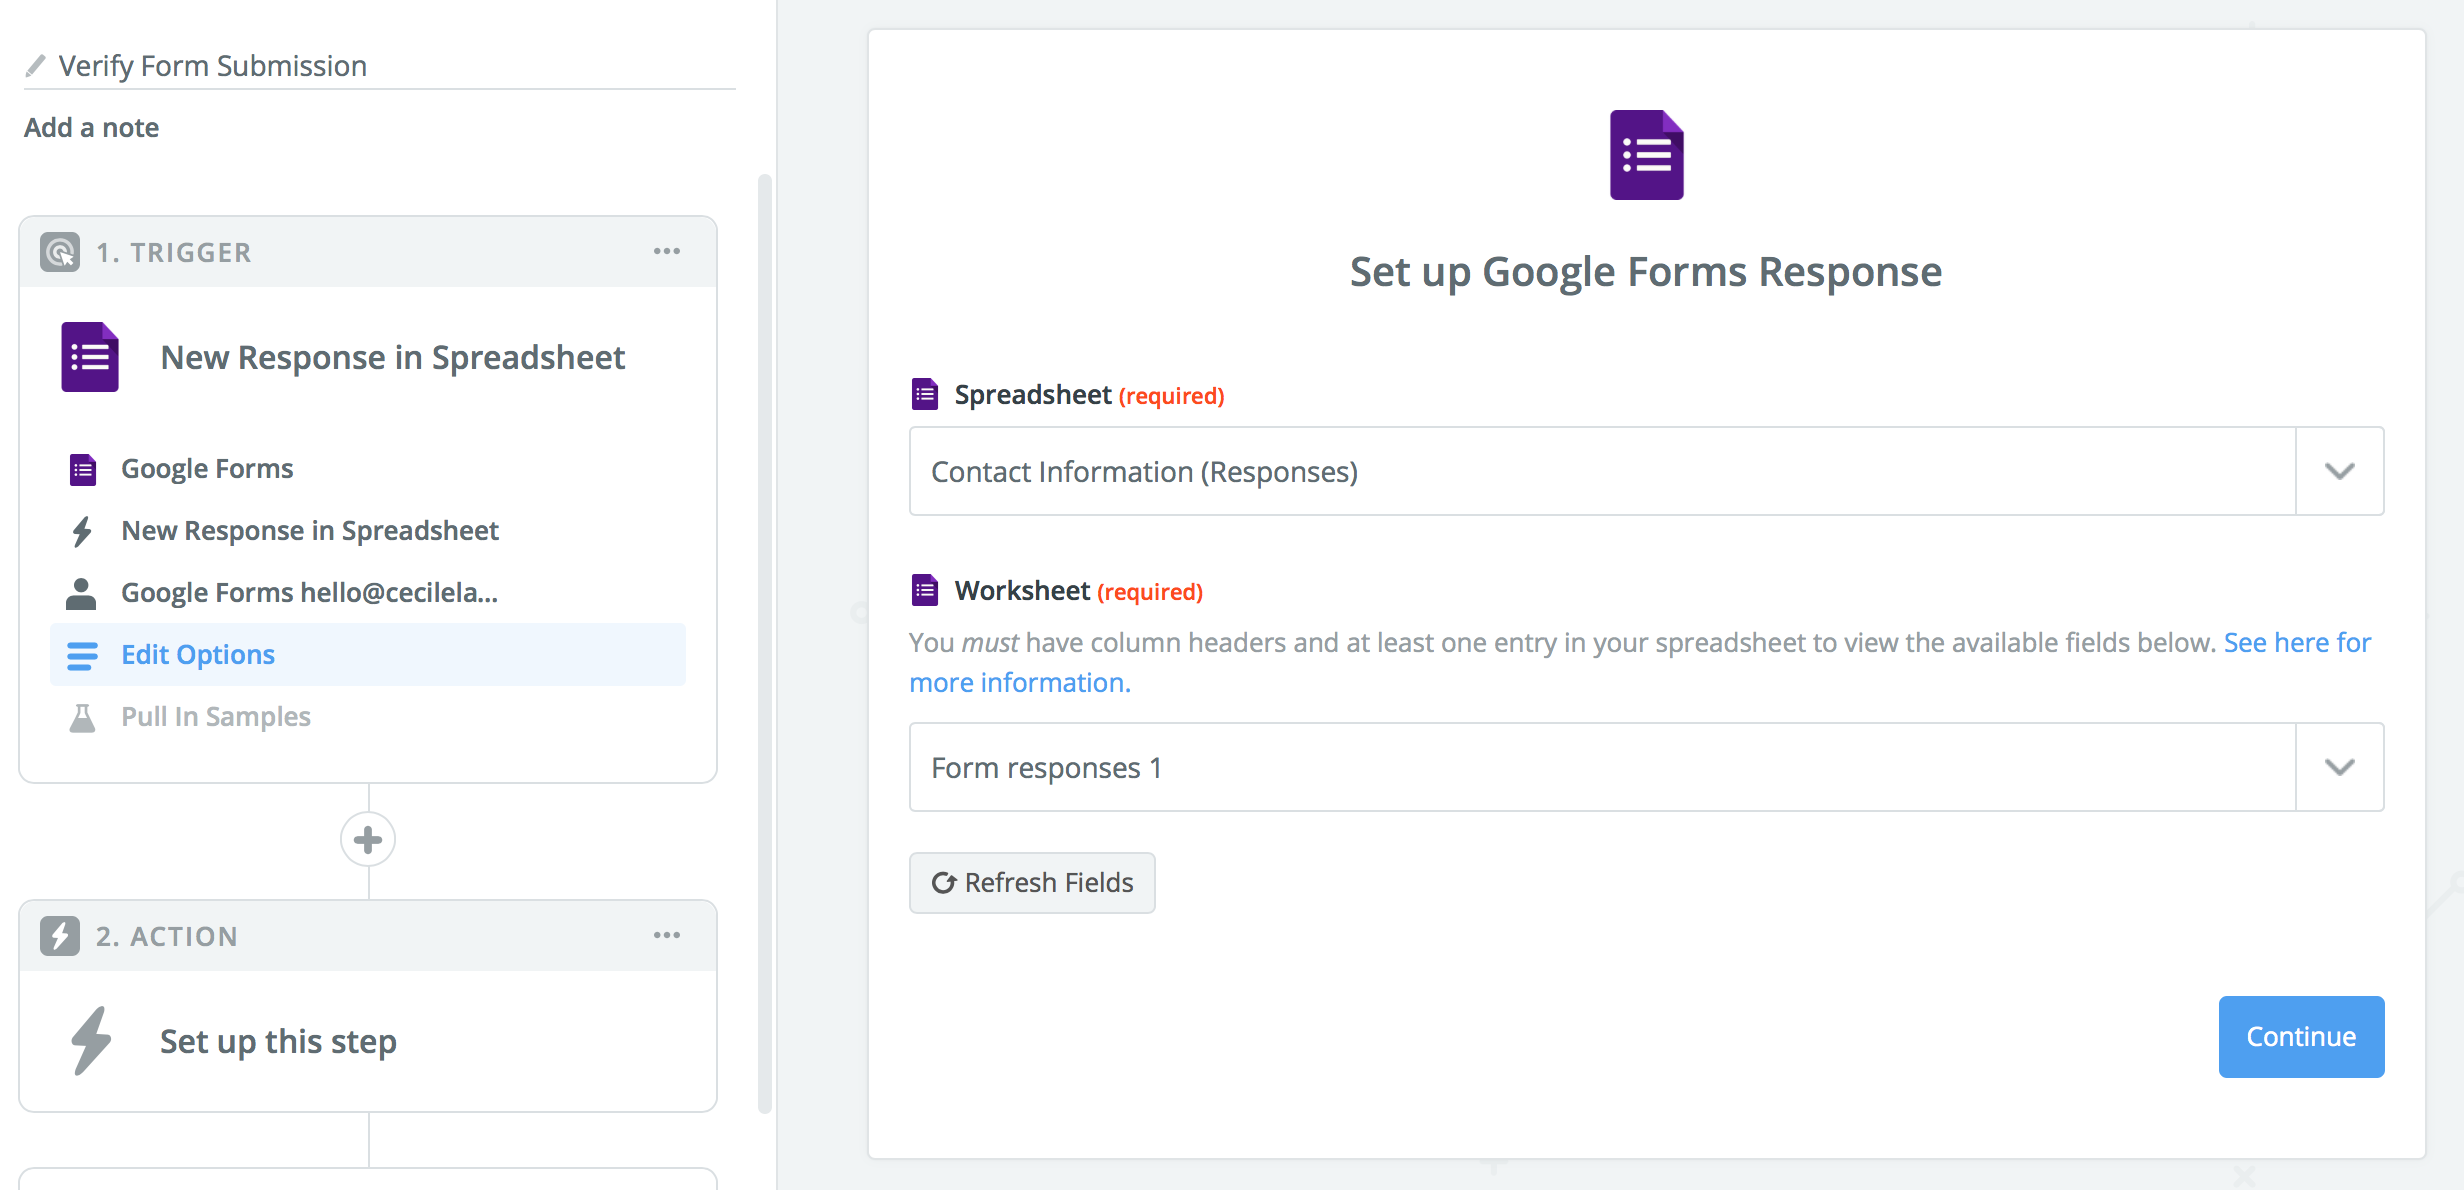
Zapier will fetch a response from Google Forms to test the connection. You can view the response here – if everything is correct, click Continue. If the response has not come through, you may have to reconnect the spreadsheet or check that the columns have proper column headings.
Zap Action
Search Zapier for NeverBounce and select it as your Action App. You will need an API key.
From the NeverBounce dashboard, go to the Apps menu and select Zapier. Enter a name to easily identify your application and Save the API.
You will be provided with a Zapier Private Key that looks like the following: zapier_xxxxxxxxxxxxxxxxxxxxxxxxxxxxxxxxx. You can reset this private key at anytime from this page, disabling the previous key. You can now use this API with Zapier to connect Google Forms.

Back on the Zapier page, you can only select one option as the action – Verify Email Address. Select this option and click Save + Continue.

Now you will be prompted to connect Zapier to one of your NeverBounce accounts (if you have previously connected NeverBounce to Zapier), or connect an account (if you wish to connect a new account).
Once an account is connected, a pop-up window will open. Enter your Zapier Private Key and click Yes, Continue. Select the new NeverBounce account and click Save + Continue.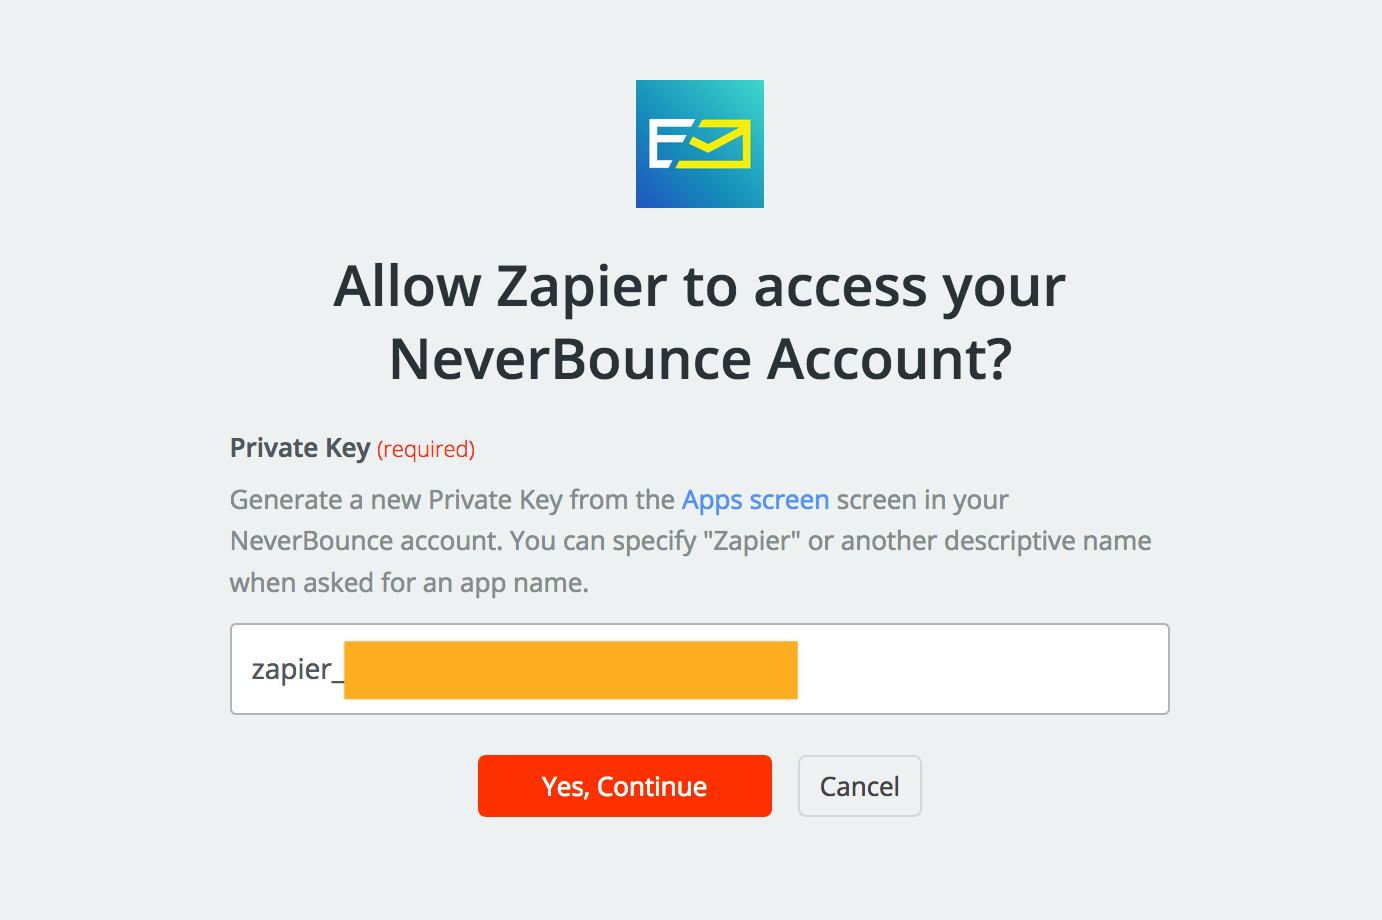
You will then be asked to test verification by choosing an email address from your Google Form. Click Continue and you will be then be prompted to Send Test to NeverBounce to test this step.
Once this step has been completed, you’ll be able to finish the Zap or add additional steps. The response from NeverBounce should always be used to perform additional actions. It should never be the final action. Some potential follow up actions include:
- Append the result code from NeverBounce to a spreadsheet in Google Docs
- Create a filter action and subscribe valid and accept all / unverifiable (catchall) emails to a MailChimp list
- Append the result code from NeverBounce to a custom field in Drip