Use our Javascript Widget to quickly and easily add real-time email verification to your Unbounce fields.

You will need:
- An Unbounce account
- A page or page element (landing page, pop- up or sticky bar) with an email field. See the Unbounce documentation if you’re having trouble building your page.

Creating the Javascript Widget
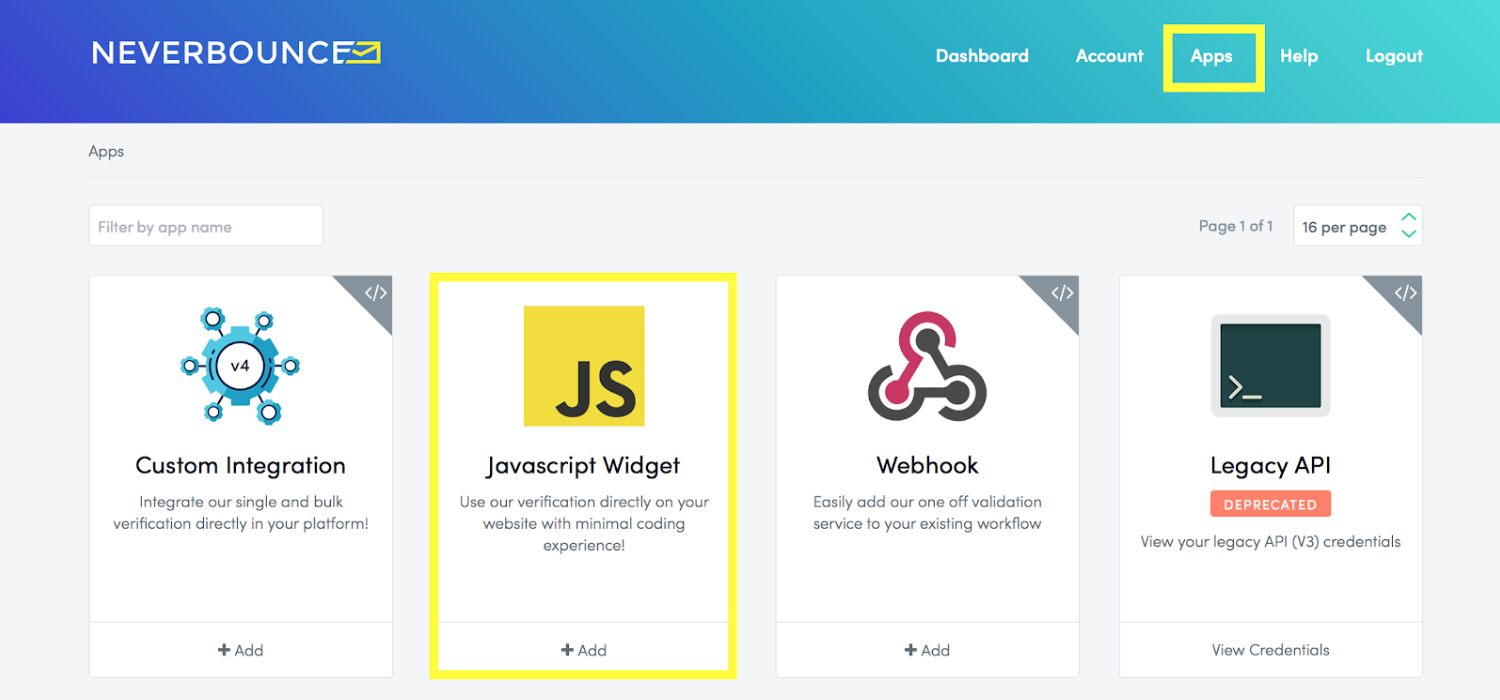
From the NeverBounce dashboard, go to the Apps menu and select Javascript Widget.

Enter a name to easily identify your application and Save the widget. You can also apply Javascript Widget Settings to protect your account from unauthorized or malicious use.

Once the Widget has been created, you will be provided with an HTML snippet and API key. Keep it safe! You can reset the API Key at anytime from this page.

Inserting the Javascript Widget into Unbounce
From the page edit screen, click Javascripts in the bottom-left of the screen. This will open the Manage Scripts window.

In the Manage Scripts window, copy the HTML snippet from NeverBounce. Make sure that Placement is set to Before Body End Tag. Click Save Code to continue.

Once your page is saved, your NeverBounce widget can start verifying emails.
NOTE: The Javascript widget will only validate emails on the preview or live version of the Unbounce page, not from the editor screen.
For most Unbounce themes, the feedback div will partially block the email field if no styling is added.

To move the feedback div to a more appropriate position, we recommend adjusting the 'margin-top' property on the .nb-feedback class until the feedback div is in the appropriate position.
Click Stylesheets on the bottom toolbar and select Add New Stylesheet.

Enter the following code snippet into the stylesheet window and click Save Code. You can tweak the margin-top value to get the feedback window exactly where you want it to be.

You can check your widget usage for Unbounce from the Apps -> Javascript Widget -> Unbounce page. To learn more about Javascript Widget functions and settings, check out our Getting Started and Advanced Widget Configuration guide.
Javascript Widget Security Settings
NeverBounce uses a credit system for email verification – this means there is a possibility that people could use your credits if they have access to your Javascript Widget.
NeverBounce provides several settings to eliminate unauthorized use and protect your account.
Add Authorized Domains

Authorized domains and IP addresses prevent your public API key from being used from unauthorized sources. Requests made with your public API key are only accepted when they come from one of your authorized sources.
If you do not specify any authorized domains or IP addresses, all requests made with your key will be processed regardless of location. We recommend adding a list of authorized domains or IP addresses to prevent unauthorized sources using the application and to protect your credit balance.
Throttle Usage
 Specifying throttling rules allows you to prevent users from abusing your forms. You can specify multiple rules to limit the number of verifications made in a given timeframe by IP, or even globally across all IP addresses. When the limit is hit, the widget will treat the request as an unknown.
Not specifying throttling rules leaves your widgets at risk for abuse. This may cause your credit balance to deplete or possibly risk account closure.


