


The Marketo integration allows you to easily import your Marketo leads into NeverBounce and send the results back to Marketo.
NOTE: This integration is not available for Marketo’s Spark level of membership
Getting Started
To get started with this integration, login to your NeverBounce dashboard and click “Add List” on the right of your dashboard. This will open a modal window displaying a list of integrations on the left.
If you have not connected this integration before:
Under “Add Integration” you will see a list of possible integrations. Scroll or use the search bar at the bottom to find the integration you are looking for. Click on the Marketo integration and you will see fields to input your Marketo credentials including your account ‘Munchkin Account ID’ and API credentials. (Find instructions for finding these credentials below.)
If you have already connected this integration:
Under “Current” you will see a list of the integrations you have connected. Click on the Marketo integration to see a list of your lists.
Finding the Credentials
For NeverBounce to connect to your account Marketo account, we need three pieces of information: your Marketo ‘Munchkin Account ID’ along with the ‘Client ID’ and ‘Client Secret’ from a custom Marketo Service created within your account.
Finding the Munchkin Account ID
To retrieve the ‘Munchkin Account ID’, navigate to the Admin tab in your Marketo dashboard. Once here expand the Integration option in the menu on the furthest-left side of the screen. You should now see a link called Munchkin. Follow this link to the Munchkin page. Here you will see the Munckin Account ID in the Tracking Code group. It should look simliar to this: xxx-xxx-xxx. This is the Munchkin Account ID needed on the NeverBounce dashboard.
Creating a Custom Service in Marketo
Creating a custom service in Marketo allows you to grant limited API access for integrations to interact with the data in your account. Before creating the custom service, you will need to create a new Role and User for the service to operate as.
Below you will see instructions for creating a new User, Role and Custom Service. Be sure to consult the Marketo documentation for the most up-to-date instructions.
Adding a User and User Role
On the Admin tab of your Marketo dashboard, expand the Security option in the left-hand menu. Follow the Users & Roles link.
We’ll first create a new Role for the User that is created. Click the Roles tab and create a new Role by clicking New Role. Here you can name the Role something descriptive such as ‘NeverBounce Integration’, and add a description if you wish.
The permissions are what really matter when creating the Role. The required permission option is Read-Write Lead. Be sure you have enabled this permission for this role; no others are required. Click ‘Create’ and the new Role is created.
Now we can create the user. Click the Users tab and then Invate New User to get started. Fill out the First Name, Last Name and Email Address with whatever you would like. Something descriptive is suggested. In the roles field be sure to select the role we created in the last step. Finally tick the API Only option and click invite.
Adding a Custom Service
Now that the user and user role has been created, navigate to the LaunchPoint page by following the link in the left-hand menu. (It may be necessary to expand the Integration option.)
On the LaunchPoint page, click New and then New Service. Name this service what you would like; again something descriptive is recommended. Under the service field select Custom. You will now see a Description and API Only User field. The description can be whatever you’d like. The API Only User however needs to be the User that was just created. Select that User and click ‘Create.’
Once it has been created, click the View Details link on the newly created service. Here you should see the Client Id and Client Secret. These are the two additional credentials needed on the NeverBounce dashboard.
Sending the Results Back to Marketo
To export results back to Marketo directly, you will need to create a field in your Marketo account.
Logged into your Marketo account, go to the Admin tab and follow the Field Management link in the left panel. On the Field Management page, click the New Custom Field link. Use this form to create each custom field. Below you will find the fields you need to create. Be sure to enter them as they appear below:
Field #1
- Type:
String - Name:
NeverBounce Validation Result - API Name:
neverBounceValidationResult
This field will contain one of the five strings ‘Valid’, ‘Invalid’, ‘Catchall’, ‘Disposable’, ‘Unknown’.
Once you’ve completed validation, click on ‘Export to Marketo’ to start the export process and the button will change to ‘Exported’.
Once the results are exported to Marketo, you can always Re-export or Undo Export. This can be done by clicking on ‘Exported’ button and selecting ‘Re-export’ or ‘Undo Export’ option.
If you’d rather download the results, select the ‘Download’ option from the dropdown next to ‘Export to Marketo’.
Disconnecting Marketo
To disconnect Marketo once you have it connected, click “Add List” from your dashboard. On the left you should see “Marketo” listed under your current integrations. Hover over “Marketo” until you see a red broken link icon to the right. Click on that icon and you will see disconnection instructions on the right.
You can reconnect your Marketo account anytime by following the instructions above.
FAQs
Where are my Smart Lists?
The purpose of validating should be to use the validation results to create rules for including contacts in Smart Lists, this is why your Smart Lists are not available for validation.
I’m receiving an error when trying to import my list.
This is typically related to Marketo’s API limits. If you have several third party integrations or a custom integration, there is a good chance you may have reached your daily limit for API transactions in Marketo. Contacts have to imported in batches of 300 from Marketo, so a list of 10,000 contacts would result in 333 API requests.
My import has been processing for a while, how long does it take? Why isn’t there a progress bar?
Importing can take several minutes for a few thousand contacts and upwards of an hour or more for larger numbers of records. This is due to the throttling put in place by Marketo which limits the number of API requests that can be made in a small time frame. Unfortunately we are unable to provide a progress indicator as we are unable to retrieve the total number of contacts in a list until importing has completed.


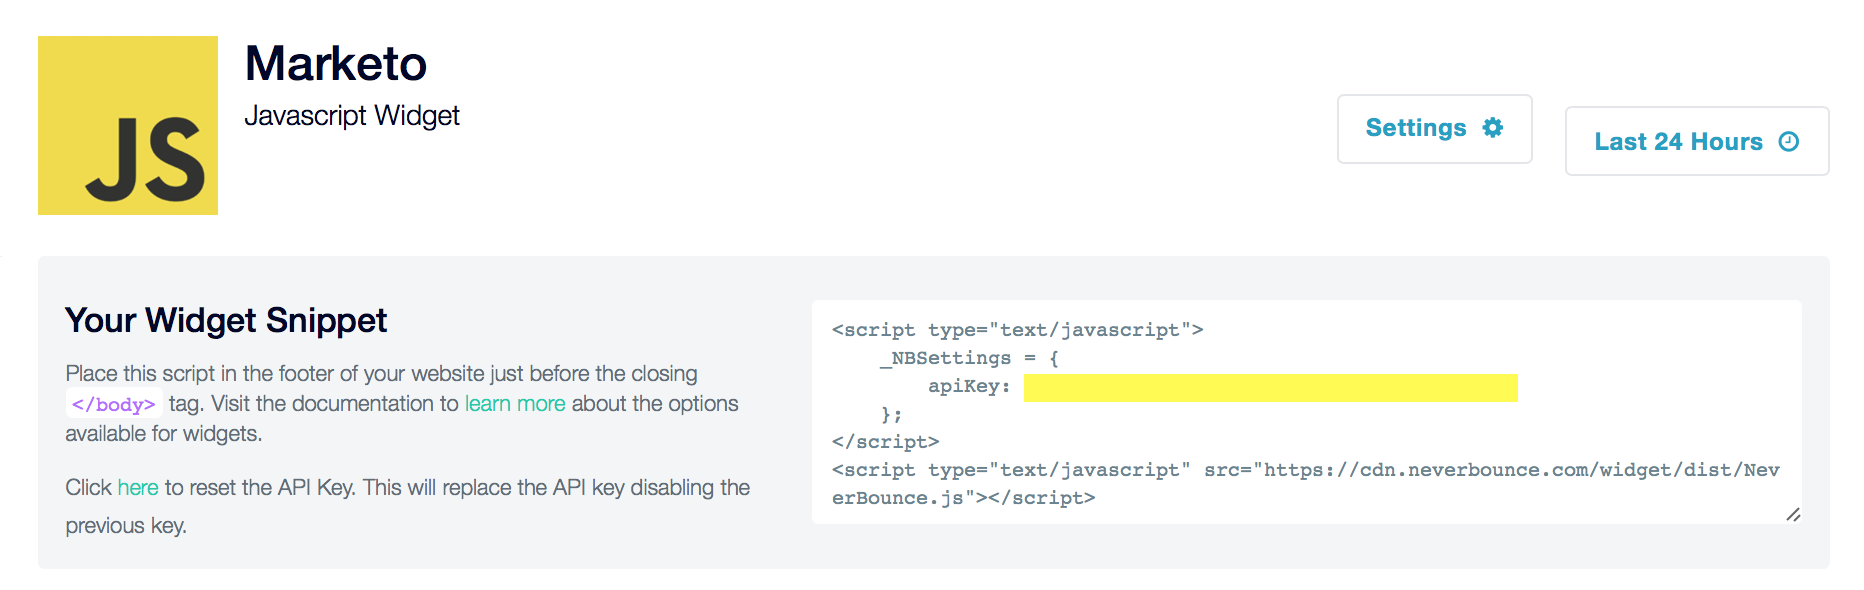


 Specifying throttling rules allows you to prevent users from abusing your forms. You can specify multiple rules to limit the number of verifications made in a given timeframe by IP, or even globally across all IP addresses. When the limit is hit, the widget will treat the request as an unknown.